Web Statistics

Saturday, January 27, 2018

Macarons with Vanilla Buttercream Filling

Basic French Macarons with a Vanilla Buttercream Filling. A crisp and chewy sweet treat

Macarons are a fun French treat that adds brightness to your day with the rainbow of cheerful colors they have. These little cookies have a perfected look and a crisp/chewy texture with sweet flavor. Specialize them even more with a variety of different flavors between the cookies and the filling. Whether you are celebrating a bridal or baby shower, wedding, or just because, macarons are a delightful addition to any celebration or everyday! You can't go wrong with these Macarons with Vanilla Buttercream Filling.

Basic French Macarons with a Vanilla Buttercream Filling. A crisp and chewy sweet treat

Macarons can be temperamental, but don't be feared. Once you figure out their texture, its response to your oven, how they react to your climate, and have patience when making them, you'll be so excited with them in the end! Macarons are made to impress, their crisp shell and pleasantly chewy inside is exactly what you want.

Basic French Macarons with a Vanilla Buttercream Filling. A crisp and chewy sweet treat

Basic French Macarons with a Vanilla Buttercream Filling. A crisp and chewy sweet treat

These little cookies are a lovely treat to enjoy, and can be to make, once you get the hang of it. Give yourself a few tries and you'll be making macarons for all occasions!

Basic French Macarons with a Vanilla Buttercream Filling. A crisp and chewy sweet treat

Here I am sharing a basic macaron recipe, but there are so many flavor combinations that can be done as well. Enjoy making these cute, elegant, and tasty sweet treat.

Basic French Macarons with a Vanilla Buttercream Filling. A crisp and chewy sweet treat


Macarons with Vanilla Buttercream Filling 

PRINTABLE RECIPE HERE

Cookie Ingredients for Macarons with Vanilla Buttercream Filling:

3/4 cup Blanched Almond Flour (this is the brand I used and found at our local Walmart)
1 cup Confectioners' Sugar
2 large Egg Whites, at room temperature
1/4 cup Granulated Sugar
Food Coloring Gel

Vanilla Buttercream Filling Ingredients: 

1/4 cup Unsalted Butter, softened
4 cups Confectioners Sugar
1/4 cup Milk
2 tsp Vanilla
1/4 tsp Clabber Girl Corn Starch


Tools to use for Macarons with Vanilla Buttercream Filling 

Pipping bag
Pipping bag tips
Food coloring gel
Parchment paper or Silpat mat

Directions for Macarons with Vanilla Buttercream Filling:

Macaron Cookies:
1. Combine almond flour and confectioners' sugar in a mixing bowl and whisk together. Pass the mixture through a fine-mesh sieve, pressing against it to break up any clumps. Set aside.

Basic French Macarons with a Vanilla Buttercream Filling. A crisp and chewy sweet treat

2. In a large mixing bowl, add the egg whites and beat using a handheld mixer or a stand mixer. Beat on medium speed until whites get frothy, about a minute. Then add the granulated sugar and beat on high for about 2 minutes until stiff, glossy peaks form, a meringue

3. Using Food Coloring Gel, add a knife tip of color to your your meringue mixture. Mix for only a small amount longer until its well blended. Use more gel for bolder colors.

4. Gently fold in the dry ingredients a little at a time. Repeat until mixture is smooth. It will run a little but not be too runny. Be sure to not over mix.

5. Using a pipping bag with a 1/2 inch round tip, filled with batter to pipe each cookie.

6. Line 2 baking sheets with parchment paper or a silpat mat and pipe batter into 1 inch circles, 1 inch a part. I use a macaron template that I found online for consistency. There are also macaron silpat mats available.

Basic French Macarons with a Vanilla Buttercream Filling. A crisp and chewy sweet treat

7. Once done piping the circles, tap the baking sheet on the countertop several times to release any air bubbles. Batter will flatten out a little. When lifting up your spatula, the batter should pour with a steadily and settle back down in the bowl.

8. Let batter sit at room temperature for 30 minutes until they for a skin. This is helpful when baking to form the signature macaron feet.

9. Preheat oven to 350 degrees.

10. Bake macarons for 15 to 18 minutes. The cookies should come right off the baking sheet when lifted off. 18 minutes worked best for me.

Basic French Macarons with a Vanilla Buttercream Filling. A crisp and chewy sweet treat

11. Let cool somewhat then transfer to a wire rack to cool completely.


Basic French Macarons with a Vanilla Buttercream Filling. A crisp and chewy sweet treat

Vanilla Buttercream Filling:
1. Using a handheld mixer or a stand mixer, cream the butter until soft and smooth.

2. Warm the milk and dissolve the Clabber Girl Corn Starch in it.

3. Add the milk/corn starch, vanilla, and confectioners' sugar a little at a time and mix together until light and fluffy, well blended.

Basic French Macarons with a Vanilla Buttercream Filling. A crisp and chewy sweet treat

Put together the Macarons: 
1. Using a pipping bag with a round tip, add the buttercream filling.

2. Pipe a swirl of filling on the flat side of the cookies.

3. Top with another cookie, creating a sandwich effect with 2 cookies with filling in between.

A Few Baking Notes:
- Do not overfold as the batter will be too runny, they will spread out and not for the signature feet. Do not under fold as the batter will crack.

- Do not skip the drying time. This will help develop a skin over the batter to create the feet when baking. They should be completely dry to touch before you bake them.

-You may need to adjust your oven temperature down some or shorter baking time depending on your oven to see for sure what works best for you.

-If you have hollow tops, you may need to adjust your oven temperature or baking time.

-Store macarons in an air tight container at room temperature for up to a week.

Basic French Macarons with a Vanilla Buttercream Filling. A crisp and chewy sweet treat

Enjoy these pretty cookies with their round tops, ruffled feet, and tasty filling between!

Basic French Macarons with a Vanilla Buttercream Filling. A crisp and chewy sweet treat


This post is sponsored by Clabber Girl but 
all thoughts/opinions are always 100% my own. 


Friday, January 19, 2018

Instant Pot Chili

Here in Indiana we have hit the coldest spell this winter. Temperatures with wind chill hitting about -15. This calls for something warm and hearty for dinner. Chili is a winter favorite for us! Chili warms up any occasion from family dinner to a game day party. The Instant Pot helps make the chili and get it to the table much faster.

A delicious chili recipe that is easy to make in the instant pot for a family meal

My husband is the chili maker in our house! The blend of flavors is delicious!

A delicious chili recipe that is easy to make in the instant pot for a family meal

A delicious chili recipe that is easy to make in the instant pot for a family meal

In the summer we have a pretty large garden and plant a few different varieties of tomatoes. I do a lot of canning and so I always make sure we can tomato juice from tomatoes in the garden.


We enjoy chili a lot in the fall and winter months, and its nice to have that canned juice right from our garden on hand.

A delicious chili recipe that is easy to make in the instant pot for a family meal

We really like the McCormick Chili Seasoning Mix. It has the right blend of flavors that we love. We prefer our chili more on the spicy side, but not too spicy rather than a sweet chili.

A delicious chili recipe that is easy to make in the instant pot for a family meal

A delicious chili recipe that is easy to make in the instant pot for a family meal

Instant Pot Chili 

PRINTABLE RECIPE HERE

Ingredients for Instant Pot Chili:

1 Tbsp vegetable oil
1 pound lean ground beef
1/2 cup fresh onion, chopped
1/2 cup green bell pepper, chopped
1 packet McCormick Chili Seasoning Mix (1.25 oz.)
1 (15.5 oz.) can red kidney beans, drained
1 (10 oz.) can Rotel Original Diced Tomatoes and Green Chilies
1 (14.5 oz.) can crushed tomatoes
1 quart jar tomato juice (I can my own tomato juice in quarts, but it also equals 4 cups.
salt and pepper to taste

Directions for Instant Pot Chili: 


1. Set the Instant Pot to Saute and add vegetable oil and chopped onions. Once pot is hot, add ground beef and chopped green bell pepper. Brown together.
2. Once browned, add the McCormick Chili Seasoning Mix and stir together.
3. Turn the Instant Pot "off" the Saute option.
4. Drain any grease if needed
5. Add the red kidney beans, the Rotel, crushed tomatoes, and tomato juice
6. Lock lid and set to Manual for 15 minutes.
7. Quick release when done.
8. Serve with saltine crackers and cheese for extra flavors.

A delicious chili recipe that is easy to make in the instant pot for a family meal

We love this chili as our main meal or as a side....and leftover chili is always my favorite!

A delicious chili recipe that is easy to make in the instant pot for a family meal


Tuesday, January 16, 2018

Ramblings from the backroad....


A few days ago, my husband and I enjoyed a fun extended weekend in one of our favorite cities, Nashville, Tennessee! We attended the American Farm Bureau Federation Annual Convention that was held at the Gaylord Opryland Hotel. The convention is in a different state each year. This is our 4th time attending, and we always look forward to it.

Our convention was full of great breakout sessions with a variety of topics. I am a volunteer for Ag in the Classroom and loved the Purple Plow breakout session for new ideas for classroom lessons!


We also heard from Reba during the closing session. A highlight of the convention was that President Trump came and addressed the thousands of farmers and ranchers that attended.

Nashville is one of our favorite cities! We first went there on our honeymoon and stayed at the Gaylord Opryland Hotel, and have been there a few times since then. The hotel is a beautiful resort and convention center that is full of indoor atrium gardens, little shops, restaurants, and a lazy river that you can enjoy a boat ride.


We really like to go downtown and enjoy the atmosphere. We enjoyed eating at the Wildhorse Saloon and Caney Fork Restaurant. A place we really loved was The Southern! We love to seek out good food when we travel and it was so worth it.


We jumped on board with the Uber service as a way to save us parking and having to drive. So many of our friends were using it on the trip and it was so convenient!! One of our drivers actually gave us the restaurant suggestion for The Southern and I'm so glad we checked it out!

Our last evening we enjoyed a Grand Ole Opry Performance!


A few things I picked up from the weekend:

This FarmHer t-shirt

This set of chapter books for my boys to read featuring stories on the farm.

Now back to our regular schedule of school, work, and sports practices. I'll be enjoying more of my Instant Pot as well!

Monday, January 15, 2018

Chocolate Dipped Wafer Cookies

I love making holiday treats for the kids parties and at home. These Chocolate Dipped Wafer Cookies are probably one of the easiest treats to make! They're fun for the kids to help with, tasty, and still somewhat "homemade."

A fun and easy treat by dipping wafer cookies in chocolate and adding sprinkles

I made these with my daughter for her preschool class party. We used pink wafers with Valentine's Day in mind. We melted white chocolate and dipped one end of the water in the chocolate then set them out on a cookie sheet. We decorated the chocolate them with different fun sprinkles.

A fun and easy treat by dipping wafer cookies in chocolate and adding sprinkles

So fun and easy to put together.

Choose a color wafer.

Use melted white, milk, or dark chocolate. .

Decorate with sprinkles, small candies, and/or chocolate drizzle to make them festive.

Wrap them up in a treat bag and attach a cute tag for fun gift giving.

Do different variations for Forth of July, Halloween, etc. 

A fun and easy treat by dipping wafer cookies in chocolate and adding sprinkles


Chocolate Dipped Wafer Cookies

PRINTABLE RECIPE HERE

Ingredients for Chocolate Dipped Wafer Cookies: 

1 package wafer cookies (Strawberry, Chocolate, and/or Vanilla)
1 package chocolate (I like to use Baker's Premium White Chocolate or Nestle Tollhouse Morsels
 Sprinkles, small candies (Valentine's Day, 4th of July, Halloween, Christmas)


Directions for Chocolate Dipped Wafer Cookies: 

1. Place the chocolate in a microwave safe bowl and melt the chocolate until smooth. Microwave on high for 30 minute intervals and stir in between.
2. Line a baking sheet with wax paper so the cookies won't stick when the chocolate has dried.
3. Dip the wafer into the melted chocolate halfway or so.
4. Place the wafer on the wax paper. While the chocolate is still warm add the sprinkles or other decorations.
5. Let chocolate cool completely and enjoy! Place in a treat bag, tie with a ribbon and add a cute tag for fun gift giving.

A fun and easy treat by dipping wafer cookies in chocolate and adding sprinkles


Thursday, January 4, 2018

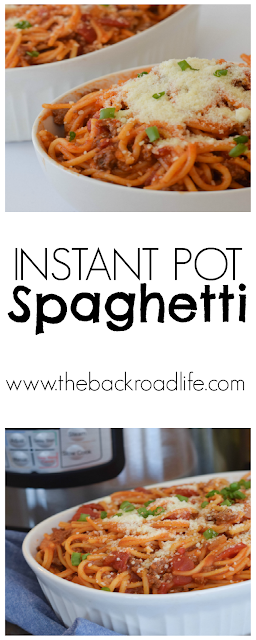
Instant Pot Spaghetti

Spaghetti is always an easy go to meal for us and all the kids eat it well. I always have all the ingredients in my pantry and its great for nights you need to get an easy meal done relatively fast. I LOVE how the Instant Pot actually helps the meal get done even quicker and it is delicious!

This Instant Pot Spaghetti is an easy meal to make for family dinner

When I got my Instant Pot, the spaghetti was the first thing I've made, and I've made a few other batches since. For dinner and to freeze for later!

So good!

This Instant Pot Spaghetti is an easy meal to make for family dinner.

Simple dinners are always a hit and with busy schedules. Between the kids in sports, homework, and the farm, sometimes simple dinners are wonderful!

This Instant Pot Spaghetti is an easy meal to make for family dinner

So with the Instant Pot, the great thing is everything can be made in the insert pot! Brown the meat and the ingredients and it cooks for 8 minutes and dinner is ready!

This Instant Pot Spaghetti is an easy meal to make for family dinner

And bonus....one pot, no colander or extra pans needed!

By time your garlic bread is done, your spaghetti will also be done!

This Instant Pot Spaghetti is an easy meal to make for family dinner


Instant Pot Spaghetti

PRINTABLE RECIPE HERE

Ingredients for Instant Pot Spaghetti: 

1 lb. lean ground beef (if not lean, just drain off the grease)
1/2 tsp pepper
1 tsp minced garlic
1/2 tsp oregano
1/4 cup chopped onion
1 (16 oz) box spaghetti noodles
1 (24 oz) jar spaghetti sauce
1 (14.5 oz) can diced tomatoes
1 (24 oz) jar water

Directions for Instant Pot Spaghetti:

1. Press the Saute button and add the ground beef, pepper, minced garlic, oregano, and chopped onion to the insert pot. Cook the ground beef until fully browned. Turn the Instant Pot off. Drain any grease if needed.
.
2. Break the spaghetti noodles in half and place them over top of the meat in the Instant Pot. Placing them crisscross will help ensure they are fully cooked and not stick together. Pour the spaghetti sauce, diced tomatoes and water over the noodles and meet, making sure the noodles are completely covered.

3. Place the lid and seal the Instant Pot. Set it to manual mode, high pressure, 8 minutes cook time. When the time is up, do a manual quick release on the vent. After the venting is completely released open the lid. Stir the spaghetti well to be completely blended. Serve with your favorite cheeses.

This Instant Pot Spaghetti is an easy meal to make for family dinner.


This Instant Pot Spaghetti is an easy meal to make for family dinner.


Get a favorite family meal to the table even faster, with this super easy spaghetti recipe for the Instant Pot!


Related Posts Plugin for WordPress, Blogger...